Fernando De Noronha, is is an archipelago of 21 islands and islets in the Atlantic Ocean, around 220 miles offshore from the Brazilian coast.Probably the most beautiful beaches in the world where only a few people know about it. Fernando De Noronha is One of the Unesco World Heritage Site as “the most beautiful marine park in the World”.
The best calm beach in the world. Beautiful, quiet, modern and secluded. The very rare combination found on the beaches in the world. Welcome to Maldives.
3. Anguilla
Ranked first in the top 10 World Best beaches of 2005 by the Discovery Channel Travel and Adventure certainly not a nonsense. Anguilla has it all. Quiet, clean, modern, complete with little island life that really “Carribbean'' 4. Boracay, Philippines
Boracay is an island in the Philippines that located about 200 miles south of Manila and 2 kms from the northwest tip of Panay island in the Visayas Region in Philippines. In 1990, It was elected by the BMW Tropical Beach Handbook as one of the best beaches in the world and again in 1996 by the British publication TV Quick as the world’s number one tropical beach.
5. Horseshoe Bay, Bermuda
Bermuda is one of the most expensive place for beach tour in the world. But that didn’t stop thousands of tourists come to visit this island every year. The friendly weather, friendly calm water and waves, crystal clear water, and the pink sand make Horseshoey Bay almost unparalleled with the rest beach of this planet. This is the best beach and island in Caribbean!
6. Kondoi, Coral beach Okinawa, Japan
Okinawa. the safest islands in the world. the door here is never locked. 3 of 10 the oldest human in the world live in these islands. Very relaxing atmosphere results from the atmosphere of a typical Japanese countryside combined with beautiful beaches. Magnificent! Just one thing need consideration, It’s expensive place.
7. Lanikai Beach, Hawaii
This beach is not so large, but this is a beach with the clearest water and cleanest blue in hawaii. Complete with view of two small islands called Mokuluas in the distance. Good Bye Waikiki
8. Mnemba Lodge, Tanzania
Most beautiful beaches in Africa continent, although not located in mainland of Africa. The trip to this beach is not easy, but if you have reached on this beach, everything seemed to be valuable with the relaxing white sand and very beautiful beach.
9. Tulum Beach, Mexico
One of the first resorts in Mexico. Perhaps hundreds years ago also had been used by the Mayan as a resort as well. Ever dream of swimming in the white sandy beach, calm and relax accompanied by a Background of mayan pyramid? Here your dream come true. You can also Escape into wonderful Villa La Estancia Puerto Vallarta resort and enjoy the vacation.
10. Whitehaven, Australia
7 Kilometers of cleanest white sand beach in one of the most isolated coast in the world would certainly be sufficient for our relaxing need. Isn’t It? Sunglasses is a necessity at this beach because the sand is truly white.
After a special month stay in Lefkada, it is time to leave .. Promo by Advance kite and cabrinha board next stop is in Athens...!!
JUST GOOD TIMES HERE/////
Have fun mates..!!
Getting off the beach Make sure you are in at least knee deep water so you don't rip your fins out when you get up on the board.
Head slightly downwind initially to generate speed.
Keep up a moderate amount of speed but control it so you don't get launched when you hit the first wave or whitewater.
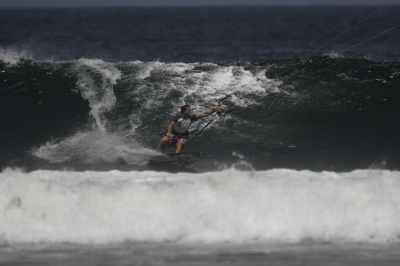
To get over whitewater bend your knees and suck up the wave and let your board ride up over the foam. Kite position is really important. Keep your kite at 45% or better still have your kite pulling down as you hit the foam. This will pull you down and help you stick to your board. A combination of these 2 skills will ensure you stay on the kiteboard with or without straps.
If the wind is light you will need to move your kite to generate enough speed to penetrate the waves.
Catching Waves From out the backThis technique is used when there is a decent swell and the wind is cross on or side shore.
Turn in front of a swell and get enough speed to stay on the moving wave.
As the waves steepens you will feel the power of the wave replacing the power of the kite.
Turn your kite down low in front of the wave and unhook as you begin to take the drop. Keep the kit low and make small adjustments as you ride along the face.
Initailly start out on the shoulder of the wave but as your confidence increases you will be able to take off closer to the pocket of the wave.
Whip at techniqueThis is great fun and basically involves doing a turn on the face of the wave to catch it.
It works in most wind directions.
1, Ride out with moderate speed
2 As you see a wave you want to ride bear away slightly downwind to get more speed.
3 Initiate the kite turn as the wave passes under the kite and spot you turn on the wave
4 Turn on the face off the wave maintaining speed and ensure your kite finishes low and in the direction that you are heading.
5 Unhooking is best done just after the turn when you start kitesurfing the wave.
Hot tip - If it is light wind unhook before the turn to generate more power and speed to catch the wave.
Bottom Turns
1 Head down the wave with feet in the sweet spot of your board. You will have unhooked just before this.
2 Keep your weight down over your heels and push hard on you back foot. The body position is like sitting back on a chair. Begin to look over your shoulder (leading) and this will create a nice smooth arcing turn.
3 As you come up off the turn get your weight forward to carry on forward speed. If you don't you will stall and fall out the back of the wave.
4 Look at the spot where you want go next .
hot tip - the amount of back foot pressure is directly related to how tight the turn is. A good bottom turn sets you up for the whole wave.
Top Turns
1 Look at the spot on the face where you want to turn
2 Plant your back foot and get your weight over your toes and initiate the turn. Looking back down the wave will help you complete the turn
Keep your weight forward to maintain speed, you can use your back hand for balance and support if you have let go of the bar.
4 As you head back down the wave flatten out the board to get ready for the next turn and keep your knees bent to absorb the drop. Hot tip Keep your kite down low and forward to help so you don'ride underneath it
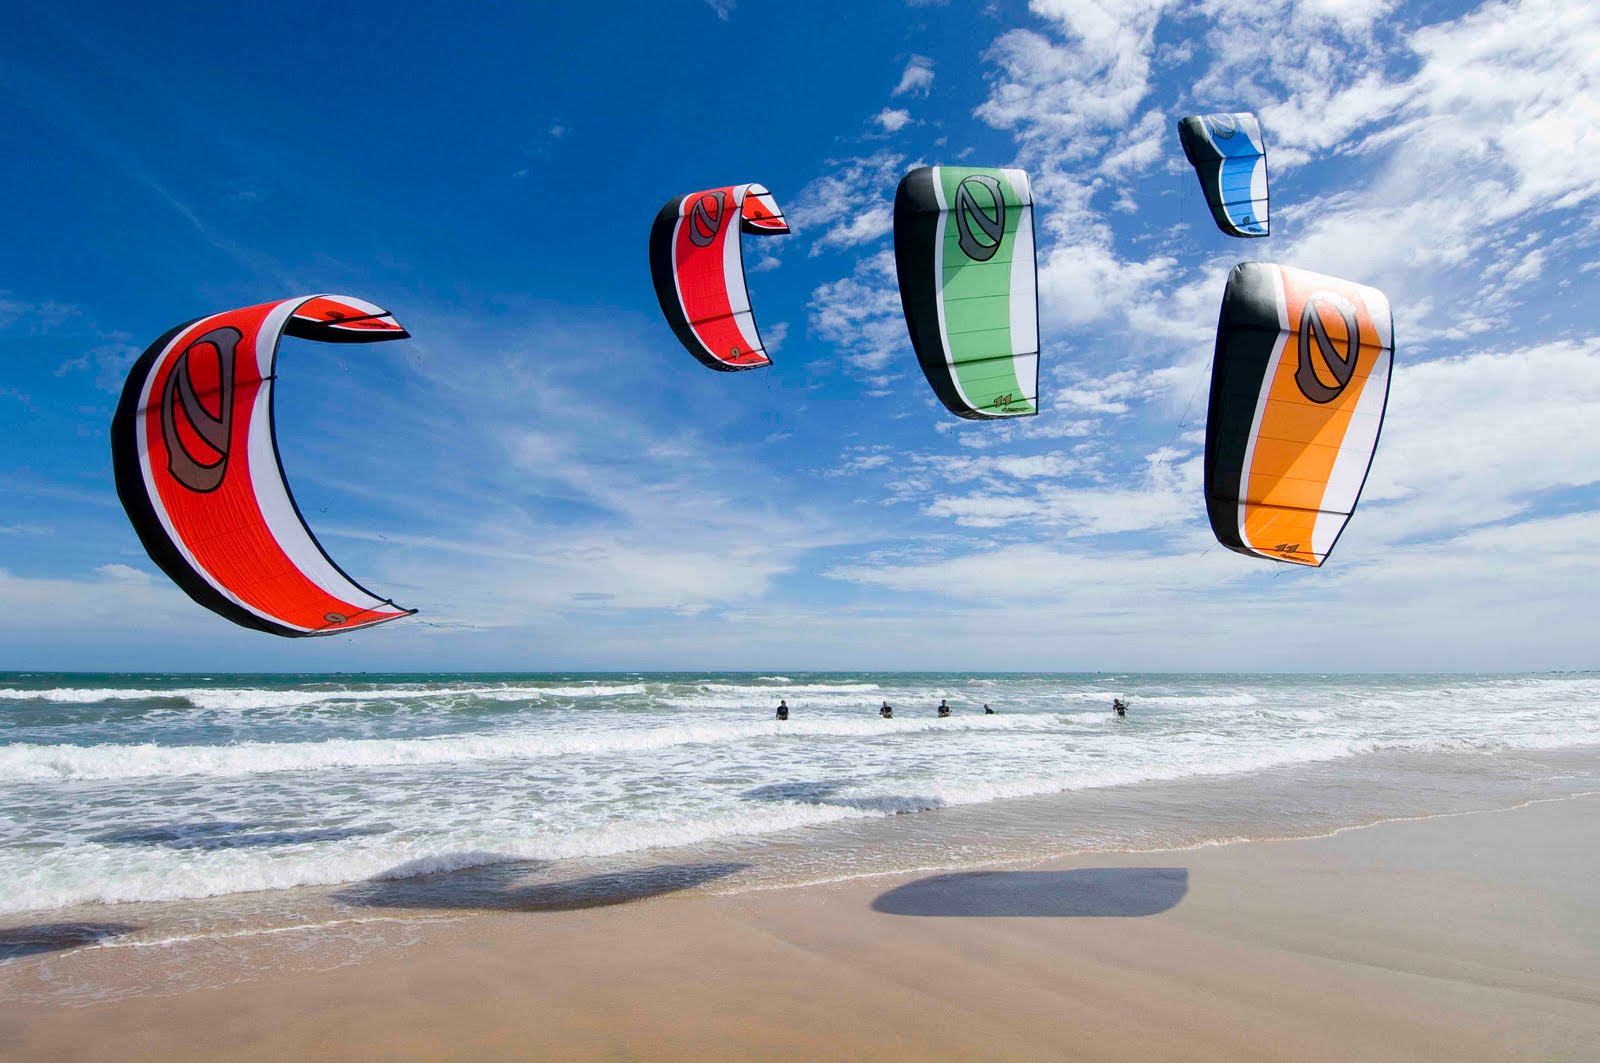
The Taboo introduces a new approach to building
the ultimate quiver of high performance kites.
Hooked or unhooked, on a wave or high above it,
racing ahead of the pack or simply riding on a whisper
of wind, each Taboo is uniquely engineered to optimize
performance for specific riding conditions..
This is the slogan of the new wonder weapon from best kite boarding the kite is due the next weeks to arrive in the shops and reflects a very interesting concept.
Since approximately 2000 manufactures adjust bar length or shape of the kite according to keeping the feel of the kite throughout the sizing the same Best is braking that habit now with reshaping drastically within the same kite range. So the 4. 5,5. 7. 8. 9 aims with a deep centre of effort and wide wingtips Unhooked surf enthusiasts and New school riders. This is reflected as well by the distribution of Dacron which is designed to be hit hard by the surf :D
The 10. 12. 14 approaches New school and big Kiteloop focused riders. Aggressive canopy shaping and a tip to tip profile is supposed to make more lift and creates a smoother feel through the kite loops.
The n15 and 17m one are light wind machines! A high aspect ratio and swept wingtips for relaunch make this kite a good light wind kite and a course racing wappon
we'll see if it delivers, but we are excited!!!
http://milosbeach.gr/
Milos Beach Resort is one of the 14 official JP/NP WINDSURF CENTERS of the Mediterranean and its the only one that disposes for rental the series JP Pro & Gold, masts X - COMBAT and booms X-6 Hybrid.
It is included in the official ADVANCE KITE TEST PRO CENTERS globally. Every year the equipment of the Club is renewed with the last year's models, while in August 2010, the models
of the year 2011 will also be available for rental.
Moreover there is variety in stock in F2, JP, STARBOARD, NEILPRYDE, TUSHINGHAM, GAASTRA, ARROWS, ADVANCE, CABRIHNA, NORTH, NAISH and SLINGSHOT.
You will also find wind & kite accessories as well as rich variety in beachwear.
All the students have a minimum 10% discount at the surf shop.
Dispose
Over 25 Pro Boards JP
Over 30 Pro Rings Neilpryde
Over 30 Boards JP
Over 35 Simple Rings Neilpryde
In August are available for rental and test all the new pro JP models and prototype Kites from the up coming year (2011).
LEFKADA ISLAND
The island of Lefkada
has two completely different morphological sides, west and east.
East side is all green, while the sea is almost always calm without waves or wind.
On this side, the biggest hotels of the island are situated as well as
the famous island of Onassis, Skorpios.
Nydri is the perfect place for wakeboarding, skiing etc.
The west side is exactly the opposite; wild beauty, open sea and four of the
most beautiful beaches of Europe: Ag. loannis, Kathisma, Egremni, Porto Katsiki.
Exotic locations and white beaches with pebbles from which the name of the
island of Lefkada was inspired (lefkes: white, ammoudies: beaches
There are three different steps you need to be acquainted with when jumping. These are Chop hop, Kite Piloting, and the combination of the two.
Chop hop
We divide jumping into 3 different sections: jumping only with your Kite Surfing Board, jumping by piloting your kite, and finally a combination of the two.
To perform a correct chop hop, you need to build up pressure, create some extra tension in the lines, and then use that extra tension, that extra power, to make a jump.
Create the tension by turning your Kite Surfing Board upwind. Push down the heel side of your back leg to turn your board upwind. As the kite will not be as fast as the board, extra tension is created in the lines, and pressure is built up. Release the pressure by stretching out your legs while turning the board downwind again.
Let’s take a closer look at the take off point. Turn your Kite Surfing Board into the wind by applying heel side pressure. Bend your knees a little more before turning upwind. As soon as your board points upwind and you feel the extra tension in the lines, stretch out your legs and release the rail by putting your board flatter on the water. Before landing, point the board more downwind. This enables a softer landing. Land the back of the board first and then the front. Absorb the landing with your knees.
Piloting the kite in this maneuver is not difficult. Set your kite at about half the height of the wind window and keep it there.
Kite Piloting
Using the power of the kite while jumping can result in phenomenal heights. First, let’s look at the movement of the kite.
The kite is set up higher in the wind window and then aggressively piloted backwards in order to keep it in the power zone. You will still be moving to one side of the wind window, but the kite is in the other half of the wind window so you will be lifted. While in the air, slowly pilot the kite back to the top. As soon as you land, pilot the kite back down to be able to ride away with speed.
From a top view, it will look like this. The kite is moved to the other side of the wind window. By piloting aggressively, the kite will stay in the power zone. Then, pilot the kite back to the top. The higher the jump is, the slower you will have to pilot the kite back. Once you have landed, pilot the kite through the power zone and ride away.
When jumping, quickly pilot the kite in the opposite direction in which you are riding. Once you are airborne, pilot the kite back to its original position. Use a lot of speed. The forward speed will be translated into upward lift as the kite is suddenly piloted to the other half of the wind window.
Start by doing very small jumps and with not too much speed. This section will discuss little jumps. When you start jumping higher, the kite movement will be a bit different.
Now let’s take a closer look closely at the kite movement. Position the kite a bit higher than half the height of the wind window, then pilot the kite aggressively to the back. As soon as you feel that you are being lifted, pilot the kite back to its original position.
The control bar must be pulled on one side to make the kite pilot to the back, as soon as you become lifted, or even a bit sooner, pull on the other side of the control bar to position your kite back in its original position.
Pull hard on the control bar with your backhand to pilot the kite to the back. Then, as soon as you are lifted, the kite is piloted back by pulling on the other side of the bar. Place your Kite Surfing Board downwind when landing. The kite will pull you downwind so you will have to land with your board pointing downwind.
Right after liftoff, pull your kite back into its normal position.
A kite needs time to be turned around, especially when it is a big kite. So when you want to pilot the kite to a certain position, start piloting in advance.
Combination
Once you are comfortable with the kite movement, you can combine the technique of the chop hop with the kite movement.
You will have to coordinate the edging and the position of the kite to get maximum height. Release your edge as soon as you feel the kite start to lift. Think about the time it will take you to pilot the kite overhead for it to create lift and also think about the time it will take you to edge the board so as to build up extra pressure. It takes time and practice to find this balance.
As with the chop hop, the board is turned slightly into the wind at take-off and then turned downwind with the landing. Look closely at the direction of the board during takeoff. Actually, you should move the board into the wind at take off.
When jumping higher, the kite movement will be a bit different compared from the previous section. When the jumps are small, the kite will have to be piloted back as soon as you take off. This is a simplified technique for jumping. The theory behind jumping is that after takeoff, you stop the kite from flying backwards by placing the bar parallel to the water. The higher you go, the longer the kite has to stay overhead before returning to its original position. As you can see, the kite is piloted slowly back overhead.
If you want to make higher jumps, you will have to pilot more aggressively. If you have enough speed and there is a strong wind, pilot the kite more aggressively by pulling the kite more in front of you where it will catch more wind. The result will be a higher and farther jump. Just before landing, the kite is piloted back to its original position.
Tips and Tricks
1. First, get comfortable with the kite movement only. Build up your speed and pilot faster when you are ready for it.
2. Let go of your Kite Surfing Board if you are in trouble and stay focused on keeping your kite overhead.
3. If your kite keeps crashing because you lose tension on the lines, let go with your backhand to force yourself to pilot the kite back.
4. If you don’t pilot the kite back to its original position, you will not be able to land correctly.
5. Again, if the kite is not piloted back to the original position before landing, the landing will not be soft.
Master the three different steps you need to know when jumping for you do with ease on water. Refer to the tips and tricks above to learn this tricky technique easier.
Riding toeside is a fun way to ride. Likewise, it makes it possible to do some nice transitions. There are two ways to end up in a toeside position. You can slide or jump into this position.When sliding, it is important to switch your weight from your heelside to your toeside at exactly the right time.
Push out your back leg to initiate the slide. As soon as your board has slided 90 degrees, change your weight to your other leg and change the weight from your heelside to your toeside.
Usually, you let go of the bar with one hand. This is not necessary but makes your body position a lot more comfortable.
Once you’re in a toeside position, divide your weight over both your legs.
Changing into toeside while jumping follows the same principles as sliding; only it is performed while in the air.
Body position
Because you‘re in an awkward position, it will take you a while to ride comfortable this way. With practice, it will feel the same as when riding normally.
What’s important is to divide your weight evenly as you would do while riding normally. Again, your front leg is less bent than your back leg. As you can see, it is much more comfortable if you leg go with one hand.
The longer you go Kite Surfing, the more there will be chances that you will find yourself in an underpowered situation. It is where the wind suddenly dies down for an indefinite period of time. Because of that, your kite loses power and then you get stranded until the wind comes back or when you choose to swim to shore. However, this situation can be very dangerous when you are out in the open water and far from shore. Immediate help can be hard to come by in this case.
Kite Surfing Techniques - Underpowered Situation What should you do then? First of all, you should remember to keep your composure and not to panic. Panicking can only result to stress which will then drain you of the energy you could instead use for swimming to shore or finding a way to get out of your current situation.
After calming yourself down, start unhooking your chicken loop and use your fixed loop. By doing this, your kite can generate more power. Also, keep in mind to go downwind. This is the only way you can get enough wind for your kite. To get more lift for your kite, keep on moving it. Making figure eights with your kite can help you generate more power while making a pattern of waves will give you less drift.
While much of the underpowered situation is caused by nature, you can take several measures to at least lessen its impact when that happens. For one, you can choose to use a kite large enough to generate power in the current wind condition. Also, you can use a longer line for your kite since they help generate more power than shorter ones. Finally, it helps to check out the wind conditions before you even go Kite Surfing. Too little wind can lead to an underpowered situation, while strong winds can lead to an overpowered one. Learn more about the latter topic in our article on Kite Surfing in Overpowered Situation. Have a great time surfing and do it safely!
Wind conditions change constantly, that's why you should know how to deal with different wind situations. For instance, if the wind is too strong for you to handle and you are surfing very fast, you are in an overpowered situation.
In an overpowered condition, opt for a smaller Kite Surfing Kite. However, if you are in open water and the wind suddenly picks up, you need to have knowledge on how to ride overpowered to get back to shore.
Kite Surfing Techniques - Overpowered Situation Set your kite very low in the Wind Window to be able to edge your Kite Surfing Board to a maximum. You don’t want the Kite Surfing Kite to be pulling you out of the water. Otherwise, you won’t be able to hold your edge. Go very slowly since the kite has to move to the edge of the Wind Window, where it will generate the least power. It is because your Kite Surfing Board has to go slower than the kite. It is a bit awkward setting you kite so low when the wind is strong, since it might pull you hard while you are piloting down the kite. But once the kite is close to the water, it will lose power. In this situation, the upward lift has to be minimal. This technique is only for more advanced kite surfers. It may take time to perfect it but practice can help you achieve just that.
It may be difficult at first when you are in an overpowered situation. Just learn the techniques to get out of it and still enjoy Kite Surfing. You will be able to know how to deal with various wind and water conditions as you gain experience.
video..http://www.youtube.com/watch?v=HSI8F03eJRA
You will have to find the balance between the speed of your kite and the speed of your Kite Surfing Board. There are three wind conditions one can ride in. There is the underpowered, perfect wind and overpowered. In the first situation, the kite will mover faster forward than your board.
Kite Surfing Board slower than Kite
If you would hold the kite still, the kite would constantly move to the edge of the wind window where it would lose its power. You will have to pilot the kite up and down to prevent the kite from moving to the edge of the wind window. It will stay more in the front where it will catch more wind. Never pilot the kite to the other half of the wind window. If you are riding to the left, keep your kite in the left half of the wind window.
You can clearly see that the kite stays in the power zone better, more in front of the kite surfer. The kite is even piloted a little bit back to keep it from flying too much to the edge of the wind window, but again, make sure that it is not piloted into the other half of the wind window.
Kite Surfing Board / Kite same speed
When the wind conditions are perfect, the kite will move at the same speed as the board.
The kite is set at an angle of 45 degrees and does not have to be piloted around as much. As the wind force always shifts a little in strength, you will have to make constant corrections to your speed. If the kite moves faster, you will have to pilot the kite up and down, as discussed in the previous sections. If your Kite Surfing Board starts moving faster than your kite, you will have to slow your board down by applying more pressure on your heels. This is called edging or railing. We will talk about this more in the next section.
Kite Surfing Board faster than Kite
When the wind picks up, the speed of the board will become faster than the speed of the kite. You will overtake your kite by setting it more back in the wind window where it will create even more pull.
By then, you will have to slow down the board. Push the edge of the board in the water by applying pressure on your heels. This is also referred to as railing or edging. Set the kite lower in the wind window so that you can apply maximum pressure on your heels.
If the Kite would be high up in the wind window, the kite would lift you a bit and you would lose your edge. Of course, you can slow yourself down by depowering the Kite and you will not have to edge as hard.
Kite Surfing requires dexterity and skill. Maneuvering the Kite Surfing Board while piloting the kite is a hard feat to do. For you to successfully Kite Surf, practice balancing the speed of the kite and the board regularly to get the hang of it. Soon, you'll be able to ride all three wind conditions.
video
There are several ways to walk upwind. You can keep the kite in the air or land it. For short distances, the best way is to keep the kite in the air.
Never keep your board leash attached when walking upwind. If the kite still generates a lot of pull, de-power the kite maximum with the de-power strap.
Don’t set your kite exactly at the top but a bit lower in the wind window. If you would get lifted when the kite is at the top, you will lose all control over the kite.
If the wind is not parallel to the shoreline, twist your body and lower your kite as you walk upwind. Make sure you direct the kite towards the water.If a sudden gust of wind pulls you over, it’s better to end up in the water than on the beach.
Sometimes, it can be comfortable to lower your kite closer to the ground. Try this out for yourself..
Dragging the Bar
When carrying the kite upwind, the lines may easily become twisted or even tangled up. This mainly happens when the kite’s wingtips flap in the wind. There are ways to prevent this.
Allow the bar to drag behind you while walking upwind. In this way, the tension stays on the lines and they won’t be tangled up by the flapping wingtips. Before launching again, be sure to check that the lines have not become twisted by accident.
Holding the bar
When the control bar is carried together with the kite, the wingtips must be prevented from flapping in the wind, or else the lines will become tangled.
Place the bar inside the kite so that it can be carried together with the kite in one hand. Ask your assistant to hand you all four lines, then hold them together with the bar making sure that there is tension on the lines. In this way, the wingtips will not flap in the wind. If you walk upwind without holding the lines, the flapping wingtips will produce a knot in your kitelines.
Rolled up lines
When the ground is uneven or rocky, you will wish to roll up your lines entirely.
Make sure that the lines are rolled up neatly. If the lines slip over the other side of the control bar, they will be twisted when they are rolled out again. Secure the lines on both sides of the bar so that they don’t come loose while walking upwind.
Place the bar inside your kite so you can carry the kite and bar in one hand and the Kite Surfing Board in the other.
Tips
When you walk upwind in strong wind, it can be handy if somebody helps you. Make sure your board leash is not attached. Keep looking at your kite while walking upwind.
But the standard rule is, if you can’t walk upwind by yourself, use a smaller kite!
Those are the things you need to know about riding upwind. Keep the guidelines above in mind and with enough practice, you'll surely perfom this technique with ease.
Going downwind or leeward is very easy if you do it by accident. This may sound strange but if you do it intentionally, it can feel awkward. Going downwind means riding away with the wind. You move at an angle greater than 90 degrees.
To turn downwind, you have to release your edge and put your board flat on the water. Be sure to put your kite high up the wind window. If you do not do this, you will start going very fast. Once your kite is high up the wind window, going downwind is a piece of cake.
video
When reaching, you are at a 90 degree angle with the wind. This is a comfortable course and you will be reaching most of the time. Due to the pull of the kite, the Kite Surfing Board will drift a little downwind through the water, so if you want to return to the spot where you started, you’ll have to be riding slightly upwind.
When reaching, your back leg is slightly more bent than your front leg, and your weight is a bit more on your rear leg. Try to relax your arms and do not squeeze the bar too hard. Turn your hips and shoulders a bit towards the direction in which you are riding.
As the power of the kite pulls you over, you have to provide a counter weight. This is a combination of using the rail of the board and your own weight. Finding the balance between the power of the kite and the counter weight takes time and practice. You have to anticipate the power of the kite as it moves through the windwindow and constantly adjust your stance in order to counter its power.
As the kite pulls you downwind, you have to edge your heel side continuously to avoid going downwind. In doing so, your Kite Surfing Board will try to turn into the wind and the kite will try to pull you downwind. The result will be a course cross to the wind.
In ideal conditions, your kite will be somewhere around half the height of the wind window. Since the wind will almost never be perfectly constant, you will have to make small corrections while riding. With less wind, the kite can be placed higher in the wind window.
video...
Waterstarting can be efficiently learned by focusing on each step of this maneuver. Once you are comfortable with one step, progress to the next.
First, manage to stabilize your Kite Surfing Kite while your feet are in the foot straps. Make sure that the kite is in the neutral zone or at the top of the wind window. Even if the kite moves slightly to one side, you will lose stability and you will not be able to get your feet in the straps.
Pull the Kite Surfing Board towards you and take hold of the board with your foot on the rear strap while you insert your front foot in the front strap. Then insert your back foot in the rear strap. Twist your feet to tighten your grip on the board. Place your feet in the straps at an angle or by curling your toes to increase your grip. Now slowly pilot your Kite Surfing Kite from one side to the other, keeping your Kite Surfing Board in front of you. You will have to move your weight around to keep stability.
Kite traction
In the next section, you will learn how fast you need to pilot the kite in order to generate enough traction to be pulled onto your board.
Pilot the kite from one side to the other and move your weight in the opposite direction to which the kite is moving. Keep repeating this exercise until you are pulled onto your board. If you need more traction, pilot faster so that the kite will move lower through the windwindow. Don’t worry about stands at this stage. This exercise is meant to introduce you to the amount of power needed to pull you onto the board.
Waterstart
Now that you’ve been introduced to the power of the Kite Surfing Kite and the amount of traction you need to be pulled onto the Kite Surfing Board, you are ready to try a waterstart.
First, concentrate on your body position and the kite movement that will pull you onto your board. Don’t worry about riding yet. For a waterstart, the kite needs to be piloted straight through the power zone. In order to accomplish this, set the kite slightly behind you. Pilot the kite from one side to the other fast. The faster you pilot, the more the kite will move through the powerzone, thus generating more power. As the kite moves down in the powerzone, it generates more and more traction and will eventually pull you onto your board. Be sure to pilot the kite back up again before it hits the water. Pilot it slowly so that it will move to the side of the wind window and lose its traction.
When starting out, position the kite slightly behind you. Should the kite be straight above, you would not be able to pilot the kite through the powerzone sufficiently. As the kite moves more in front of you, it will catch more wind and at one point, you will be pulled onto your board. Stop the kite from moving downwards and pilot it to the side of the wind window. At the edge of the wind window, the kite will not generate any traction so you will fall back into the water.
The kite moves through the powerzone and returns on the edge of the wind window. The starting position is right to the top of the windwindow, moves through the powerzone, and returns on the edge of the wind window.
Now let us go to the best body positioning for the waterstart. Your legs should be bent, your front leg less bent than your back leg.
Crouch down and make your shoulders close to the bar so that you will be easily pulled onto the Kite Surfing Board. Anticipate the pull the kite will generate by moving your weight onto your back leg. As soon as your board is completely out of the water, move your weight slightly back to your front foot. Your front leg should be less bent than your back leg. In this way, you will waterstart slightly downwind that is precisely what you want. Your board needs to speed up before you will be able to turn the board and set the preferred course.
Stay in the powerzone
After waterstarting, you need to keep the kite in the powerzone so that you will not fall back in the water right after. Pilot the kite as you would while waterstarting but when the kite gets close to the water, pilot the kite aggressively back up again. The kite has to stay in the powerzone, in front of you, and should not fly to the edge of the windwindow. The lower the wind conditions, the faster you have to pilot.
At this point, the kite stays in the powerzone all the time. Therefore, after it has been piloted down, it should be piloted straight back up keeping it in the powerzone.
Make sure that you keep the kite in one side off the window and it does not fly it into the other half.
For beginners like you, it is safer to practice waterstarting with a small kite. This is also the reason why you need to pilot the kite up and down as much. When using a bigger kite, you can keep the kite more in one place.
Start first edge later
Maneuver your board when you have some speed. When the wind conditions are lower, you need longer time to go downwind to pick up speed.The kiteboard is maneuvered downwind until the board has enough speed. Then for you to maneuver it upwind, apply heel side pressure.
Tips and Tricks
A common mistake made by kite surfers is that the Kite Surfing Kite is not piloted through the powerzone. In the powerzone, it does not generate enough traction to pull you onto the Kite Surfing Board. The kite moves on the edge of the wind window.The movement of the kite will look like this. The kite stays in the neutral zone of the wind window. Pilot the kite faster to get more traction. If you do try to stand up, things can get funky.
If you are still not pulled onto your board even if you are already piloting fast, change to a bigger kite or a bigger board.
As the wind will be different every time you practice, adapt your piloting to the strength of the wind. Start piloting slowly. You can only start piloting more aggressively if the kite does not generate enough traction.
Don’t waterstart until you are totally stable or else you will not succeed. Set the kite at the top, find stability and try again.
If you don’t bend your back leg more than your front leg, your Kite Surfing Board will not get any grip on the water.
Point your board downwind by stretching out your front leg and pulling in your back leg.
If you steer your board too soon upwind, the board will not have enough grip. Point your board downwind for a longer while.
Don’t practice waterstarting with onshore winds. You can start with onshore winds if you are already an experienced rider.
VIDEO..
First, position the Kite Surfing Kite with its leading edge down. The kite will always end up in this position by itself. For a water re-launch, the kite must be turned on its back. Do this by walking quickly towards the kite and slacking the lines.Because the leading edge will point towards the water and not towards the sky, the bar will have to be turned around before the kite is launched. There has to be half a twist in the lines. Another way to help you remember this is to always have the red side of the bar on the left.Pulling in the center line and releasing it will help turn the kite on its back.Pull the bar on the side where the Kite Surfing Kite is going while walking in the opposite direction. As the kite starts turning, pilot the kite slowly up from the water. If the kite goes in the opposite direction as expected, follow the kite. Only start piloting the kite up when it has moved to the edge of the Wind Window, then slowly pilot the kite up.As the kite usually launches with a lot of power, make sure that there is enough space downwind, in case you are dragged along behind the kite.
In deep water
Launching in deep water follows the same principles as in shallow water, with the exception that everything has to be carried out while swimming.
In order to turn the Kite Surfing Kite on its back, pull in the center lines, then release them and swim powerfully towards the kite. If necessary, swim with both hands. When taking hold of the bar again, make sure you know which side of the bar is to be on the right and which on the left. With this Cabrinha kite, red goes left. Keep swimming and slowly pilot the kite in the air which will feel heavy as it is wet.
Tips and Tricks
Keep the tension on the flying lines as soon as the kite has turned on its back. If you don’t do this, the kite can do some unexpected things. What we also see happening is here is the result of not having your bar the right way around. If you look closely, you can see that there is no half a twist in the lines as the kite is turned on its back. So, as soon as the kite catches wind, the kite will respond exactly the opposite way of what you would expect. Keep the red side of the bar always on the left!
Sometimes, the kite even turns inside out resulting in crossed lines. You will still be able to pilot the kite but don’t keep riding too long, as your lines will wear out fast.
If your Kite Surfing Kite ends up on its trailing edge, wait until it ends up on its leading edge. In the case that the kite launches by itself, anticipate on a very heavy pull by the kite.
Body dragging is the act of being pulled through the water without assuming a standing position. This is usually done with kite surfers lying on their stomach while on water.
Straight
A good way to get familiar with the kite and the generated traction is Body Dragging
Before starting to body drag, hold the kite low to the water on one side of the wind window. Let yourself be dragged out to open water. Once out to open water, it is less dangerous to make a wrong turn. You will be far away from the beach and dangerous obstacles.
Pilot the kite from left to right through the wind window. First, try these exercises without hooking in. As you get more comfortable, you can pilot the kite faster from one side to another, moving your kite further down through the power zone.
Half the Wind Window
When you use only one side of the wind window, the kite will pull you sideways. You will use this technique when you go out riding with a Kite Surfing Board. Get used to piloting this way and it will help you out later. Position your body in such a way that you will be dragged on your side.
Feet in front
A good exercise to prepare yourself for the water start is to pilot the kite while keeping your feet in front of you.
For a water start, you’ll have to be able to keep your board in front of you while piloting the kite in the right position. The following exercise will help you gain that stability. Put your feet in front of you and slowly pilot the kite from one side to the other.
Hooked in
When you are comfortable doing all the exercises unhooked, practice doing them hooked in. Make sure that your safety systems work and that you know how to use them.
Upwind
When you start riding without a board leash, you will need to know how to recover your board if you lose it, for instance while jumping.
Stretch out one arm in front of you. Your arm and hand will function as a fin, preventing you from drifting downwind. Position your kite low to one side. Don’t pilot too low or the kite will lose its traction. Make your way upwind by switching direction every now and then. Slowly pilot your kite overhead or you will be dragged downwind again.
Those are the essential things you need to know about Body Dragging. Just remember to practice and perform this technique with caution.
Depowering the kite can be done in several ways. One method is by connecting the lines to different knots on your kite.
You can depower the kite by pushing the bar away from your harness. The kite will power up by pulling the bar towards you.In this case, the tension on the outside lines will increase, tilting the kite backwards. This allows more wind to be blown into the sail, thus creating more pull. Releasing the bar does the opposite.
Depower with strap
When depowering the kite using the strap, you influence the tension on the center lines. If you pull the strap, the kite will depower. If you release it, the kite will power up.
Depowering with a bar and with a strap are the two standard ways around. Practice how to perform this technique for you to successfully pull it off when necessary.
Before landing, give the international sign for landing and slowly pilot your kite down. This way, it will stay at the edge of the Wind Window and will not generate much traction. Your assistant must take hold of the leading edge of the kite near the center.
As soon as your assistant takes hold of the kite, walk towards him or her to ease the tension in the lines. He or she must not let go of the kite until you have recovered it.
Helpful Tips
Walk towards your assistant if he or she is too far upwind or downwind.
When landing, make sure that the kite stays at the edge of the Wind Window. If you pilot too fast, it will move through the Power Zone and generate too much traction.
Seek assistance if the wind picks up or you are uneasy about landing.
If you want to land the kite quickly because, for instance, you are exhausted, let your assistant know while you are still on the water. Your assistant will be ready to grab your kite as soon as you pilot it close to the ground.
The only way to land safely when alone is to use your quick release system. Pilot the kite to neutral - the top of the Wind Window. Practice using your quick release mechanism.
When landing the kite, be sure to instruct your assistant very well. Put your kite at the top of the Wind Window and take time to talk to your assistant.
Landing Alone
When landing alone, use the kite's safety system. Make sure that your kite leash is connected to either one of the front or back lines. Release your hand from the bar after positioning your kite above the wind window. As the kite falls, walk downwind towards it, lessening its speed. Corollary, the speed of the fall of your kite will increase if you walk upwind as it falls down.
If the kite is at the edge of the wind window, refrain from letting go of the bar because it will lead your kite to roll downward that could lead to damage. After the kite landed on the ground, approach your kite, maintaining the tension in the line that is joined to the leash. Do not grab any line aside from it because the Kite may momentarily recover the tension.
Keep the tension in one line to recover the kite. Make sure that you are away from the bar and other lines. Learn how to correctly recover the kite after landing with the help of your instructor or a Kite Surfing expert
Setting Up Kite for Launch
1. Swivel lines to be 90 degrees to wind. (if low wind, lines can be placed slightly downwind).
2. If someone is aiding launch, they should:
a. Grab leading edge of kite, and shake off any sand on kite.
b. Place kite 90 degrees to wind, with the inside of kite facing the wind and the leading edge facing into the wind.
c. Let go with a verbal command or thumbs up signal by kite flyer.
3. If self launched with sand:
a. Hold only one line at control bar and drop control bar.
b. Walk down from control bar using only this one line to kite
(with other lines down wind).
c. Grab leading edge of kite
d. Place kite 90 degrees to wind, with the inside of kite facing the wind and the leading edge facing into the wind.
e. Fold over end of lower wingtip.
f. Put sand on fold to stabilize and hold down the kite, and
g. Walk back to control bar and launch.
Launching Kite
1. Verify that kite is in launch position with kite at right angles to wind (or slightly downwind in low wind conditions).
2. Hold control bar with red end on left.
3. Put on safety strap on left wrist.
4. Hook into harness with quick release shackle if you have one.
5. If 4 line kite, push out from chest control bar.
6. Launch pulling equally for 2 seconds to gain speed.
7. After 2 seconds, pull on upper wing tip to start slowly raising kite upward (this may include figure 8 loops ).
8. Continue slow ascent until at 12 o'clock or desired position.
9. If low wind, continue small figure 8 loops from 11 to 1 o'clock.


